How to add your Orbit chain to Arbitrum's bridge
Orbit chains are now Mainnet ready! Note that Orbit is still a public preview capability - the Orbit product and its supporting documentation may change significantly as we capture feedback from readers like you.
To provide feedback, click the Request an update button at the top of this document, join the Arbitrum Discord, or reach out to our team directly by completing this form.
This how-to will walk you through the process of adding your Orbit chain to the Arbitrum bridge. There's one section for mainnet Orbit chains, and another for local testnet Orbit chains. You can access either section using the links on the right column.
Request adding a mainnet Orbit chain to the Arbitrum bridge
Mainnet Orbit chains can be added to the Arbitrum Bridge by filling out this form.
Once receiving your request, our team will review and apply internal criteria to include your chain in the bridge. Here are some of the criteria that a chain must follow to be added to the bridge:
- The use case must fall within existing legal and marketing guidelines
- The core rollup / token bridge contracts must not have been modified, except the cases where modifications have been done with a certified partnership and communicated to Offchain Labs
- The infrastructure and core contracts are hosted by one of our partnered RaaS teams
Add a local testnet Orbit chain to the Arbitrum bridge
Currently, adding a testnet Orbit chain to the Arbitrum bridge must be done locally. This means that you will configure the UI to display the desired chain, but this change will only apply to you.
Prerequisites
- A local testnet Orbit chain's configuration. See the Orbit quickstart to deploy a local Orbit chain, or use an existing JSON configuration.
- A browser-based Ethereum wallet (like MetaMask)
Procedure
- Navigate to https://bridge.arbitrum.io/.
- Connect to the bridge UI using your wallet. The bridge UI will automatically switch to the correct testnet view.
- Activate "Testnet mode", by clicking on your address in the top right corner -> Settings -> Turn on testnet mode.
- In the same screen, scroll down to "Add Testnet Orbit Chain":
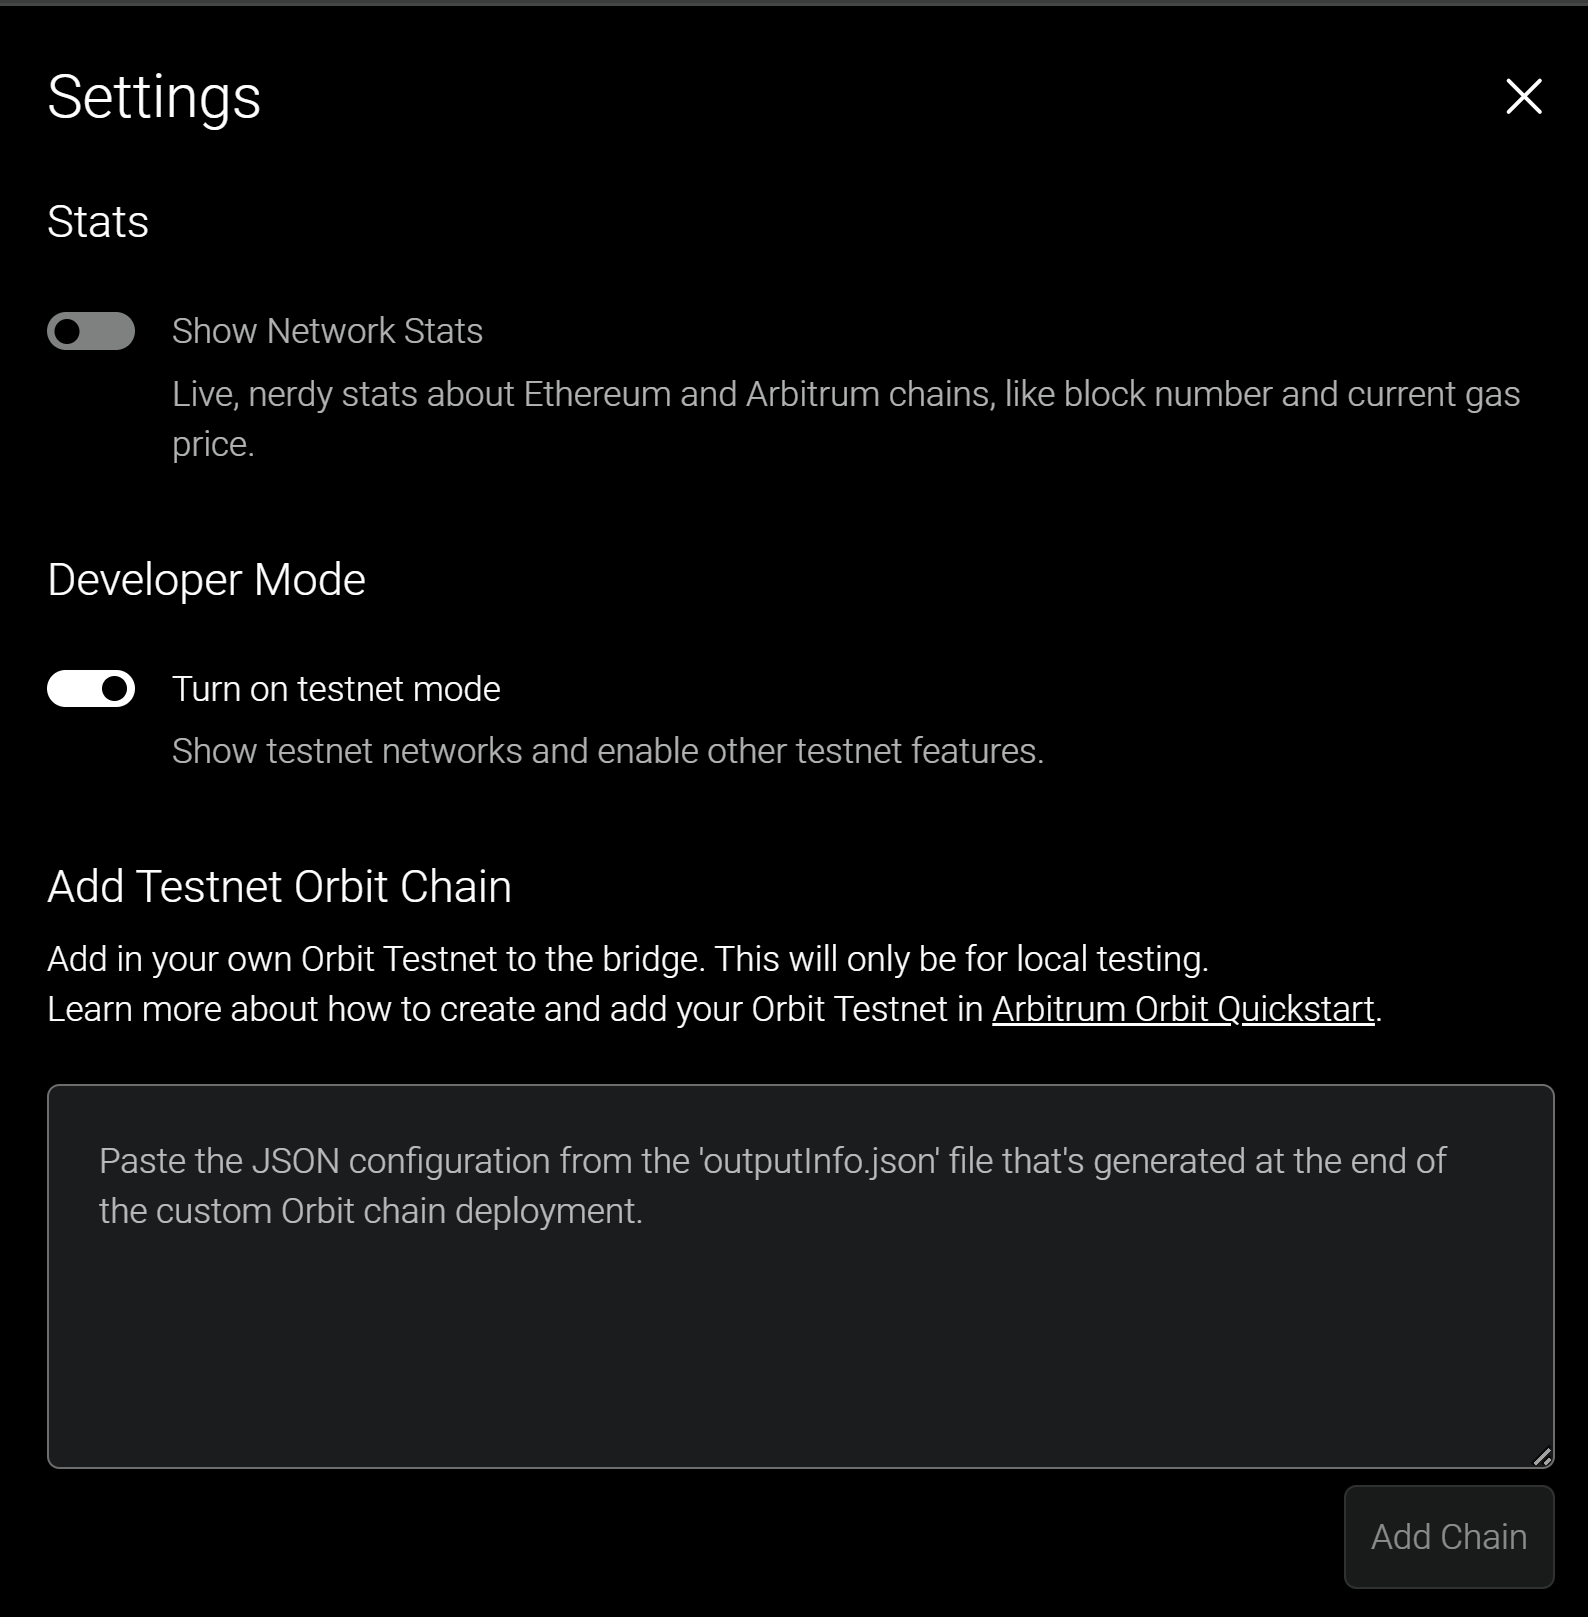
- Copy and paste the JSON configuration (for Orbit chains deployed locally, use the configuration in your generated
outputInfo.jsonfile). - Click "Add Chain".
Congratulations! Your chain should now appear in both the network dropdown in the top navigation pane, and as an option in the bridging UI directly.